Overview
In this blog we are going to learn the following:
- How to create Configuration System(system.xml) in Magento 2?
- How to set default value using config.xml file?
- How to create Helper Class to get value from configuration?
system.xml
The system.xml is a configuration file which is used to create configuration fields in Magento 2 System Configuration.
Step 1 : Create all the commonly needed files:
Refer this blog and create module.xml file inside etc folder and registration.php file inside Code5fixer_Helloworld folder
Step 2 : Create system.xml file :
If our module has some settings which needs to be set by the admin, then we will definitely need this file.
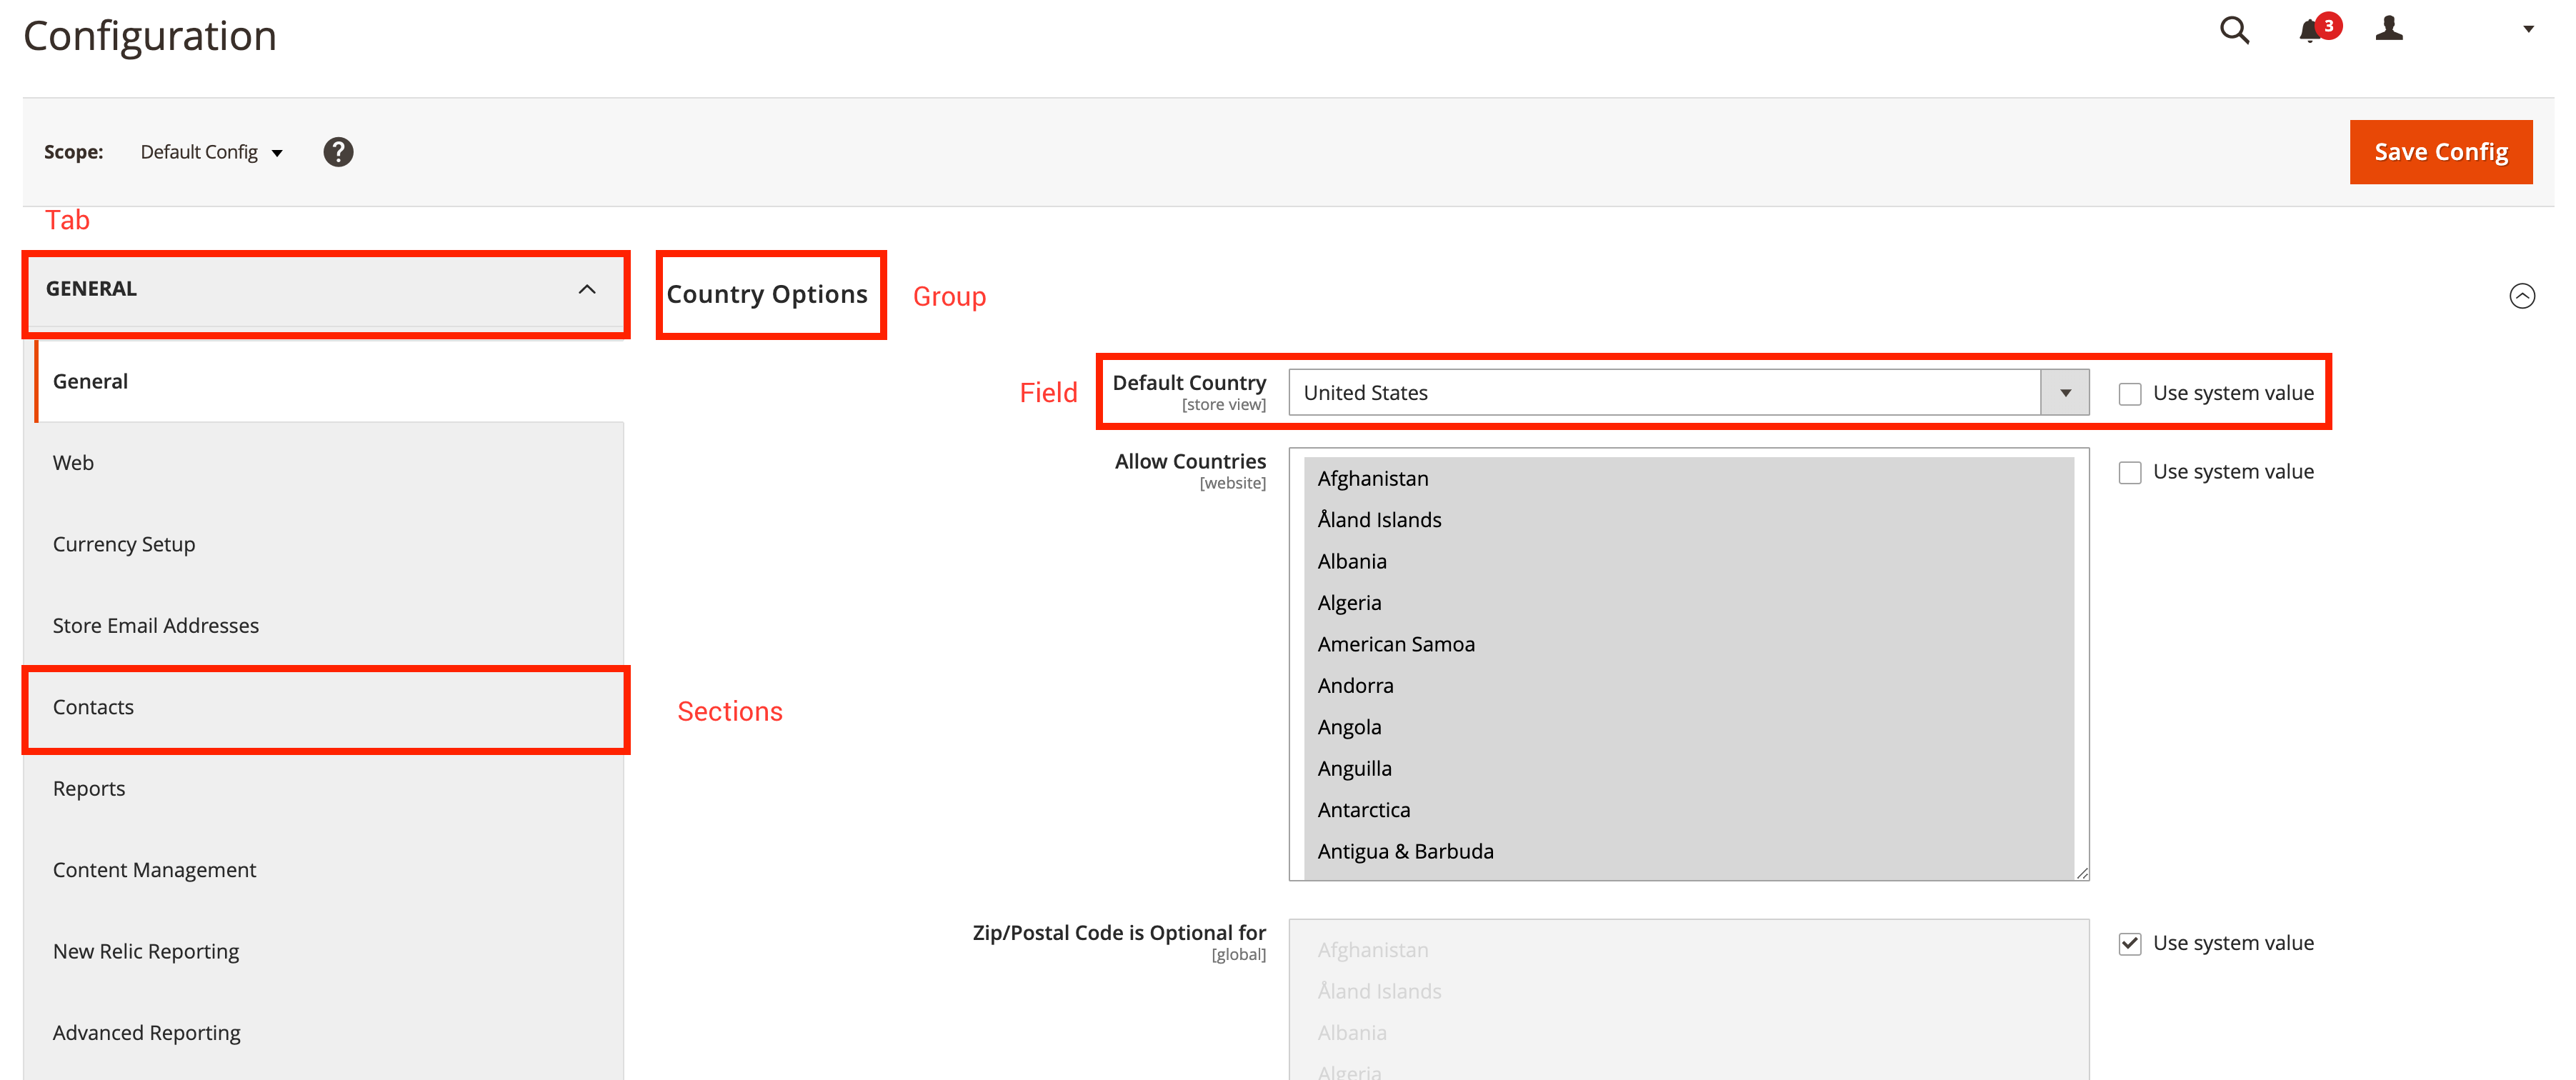
The magento 2 system configuration page is divided logically into these parts – Tabs, Sections, Groups, Fields. Please check the below image to understand this:

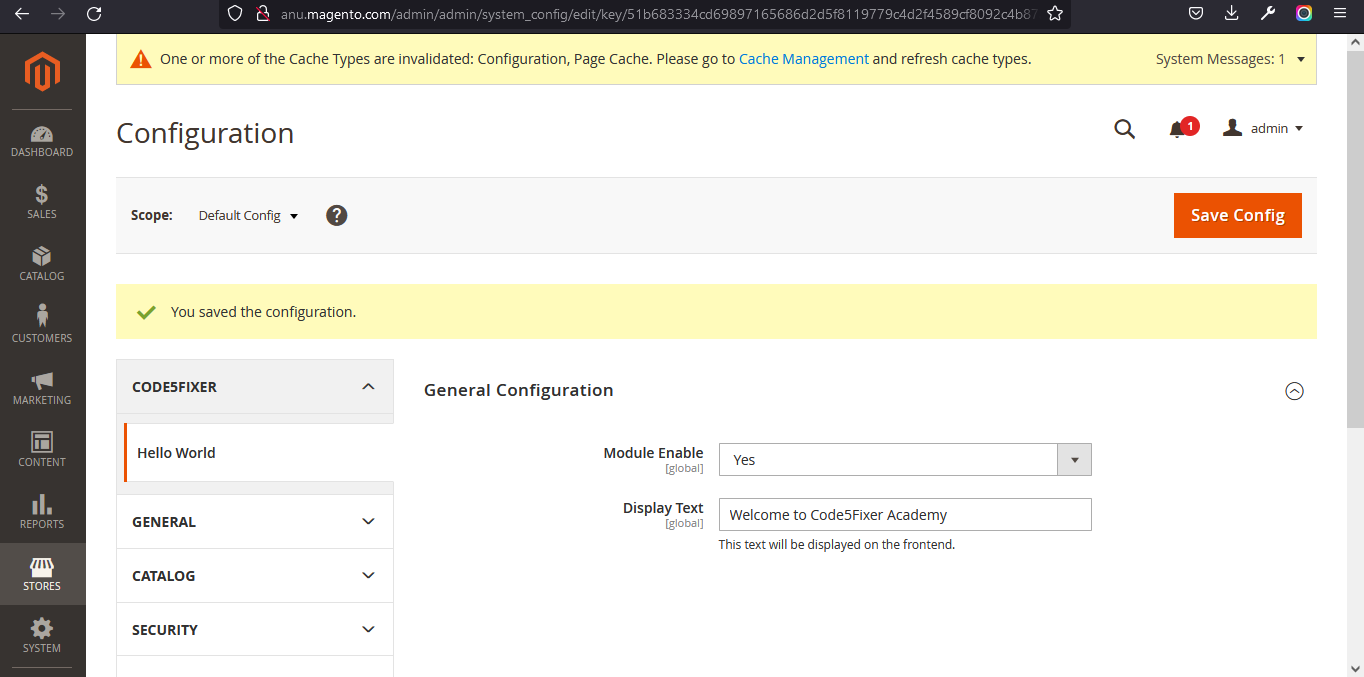
So let us create a simple configuration for the simple Module Helloworld. The system.xml is located in etc/adminhtml folder of the module, we will create a new Tab for our vendor “Code5fixer”, a new Section for our module Helloworld, a Group to contain some simple fields: enable module and text.
Create a folder inside etc folder of your module and name it as adminhtml and inside adminhtml folder you should have your system.xml file.
The contents of system.xml file will be:
system.xml
<?xml version="1.0"?>
<config xmlns:xsi="http://www.w3.org/2001/XMLSchema-instance" xsi:noNamespaceSchemaLocation="urn:magento:module:Magento_Config:etc/system_file.xsd">
    <system>
        <tab id="code5fixer" translate="label" sortOrder="10">
            <label>Code5fixer</label>
        </tab>
        <section id="helloworld" translate="label" sortOrder="130" showInDefault="1" showInWebsite="1" showInStore="1">
            <class>separator-top</class>
            <label>Hello World</label>
            <tab>code5fixer</tab>
            <resource>Code5fixer_Helloworld::helloworld_config</resource>
            <group id="general" translate="label" type="text" sortOrder="10" showInDefault="1" showInWebsite="0" showInStore="0">
                <label>General Configuration</label>
                <field id="enable" translate="label" type="select" sortOrder="1" showInDefault="1" showInWebsite="0" showInStore="0">
                    <label>Module Enable</label>
                    <source_model>Magento\Config\Model\Config\Source\Yesno</source_model>
                </field>
                <field id="display_text" translate="label" type="text" sortOrder="1" showInDefault="1" showInWebsite="0" showInStore="0">
                    <label>Display Text</label>
                    <comment>This text will be displayed on the frontend.</comment>
                </field>
            </group>
        </section>
    </system>
</config>
- From this code, we will get to know how to create a Section, Group and Field .
- The Tab element may have many sections and some main attributes and child.
- Id attribute is the identify for the tab.
- sortOrder attribute will define the position of the tab.
- Translate attribute lets Magento to know which title needs to be translated.
- Label element child is the text which will show as tab title.
- Section element will have id, sortOrder, translate attributes like the Tab element.
Step 3 : Create config.xml file:
As of now, each field in system.xml will not have any value. When you call them, you will receive ‘null’ result. So for this module, we need to set the default value for the fields and save it. This default value can be given in config.xml file which is located in etc folder. Let’s create this file for our simple configuration module.
The contents of config.xml file will be:
config.xml
<?xml version="1.0"?>
<config xmlns:xsi="http://www.w3.org/2001/XMLSchema-instance" xsi:noNamespaceSchemaLocation="urn:magento:module:Magento_Store:etc/config.xsd">
    <default>
        <helloworld>
            <general>
                <enable>1</enable>
                <display_text>Hello World</display_text>
            </general>
        </helloworld>
    </default>
</config>
In this file, we set ‘1’ as default for the field ‘Module Enable’ and ‘Hello World’ as default value for the field ‘Display Text’.
By the end of this step, Flush your cache, login to your admin page and you could see Code5fixer tab in Configuration.

Step 4: Create Helper class
In Magento 2, Helper Class includes various functions and methods which are used commonly throughout the application. All the methods which have been declared as Helpers can be called anywhere including file, model, block, controller class or from another helper in Magento 2
To implement this, create a folder inside your module and name it as Helper. Inside Helper folder create a php file and name it as Data.php
The contents of Data.php file will be:
Data.php
<?php
namespace Code5fixer\Helloworld\Helper;
use Magento\Framework\App\Helper\AbstractHelper;
use Magento\Store\Model\ScopeInterface;
class Data extends AbstractHelper
{
    const XML_PATH_HELLOWORLD = 'helloworld/';
    public function getConfigValue($field, $storeId = null)
    {
        return $this->scopeConfig->getValue(
        $field, ScopeInterface::SCOPE_STORE, $storeId
    );
    }
    public function getGeneralConfig($code, $storeId = null)
    {
        return $this->getConfigValue(self::XML_PATH_HELLOWORLD .'general/'. $code, $storeId);
    }
}
Step 5: Create Controller file
Now, we shall try to get it in Controller
File : 1 routes.xml Create a folder inside etc folder and name it as frontend. Inside frontend folder, create a xml file and name it as routes.xml
The contents of routes.xml file will be :
routes.xml
<?xml version="1.0"?>
<config xmlns:xsi="http://www.w3.org/2001/XMLSchema-instance" xsi:noNamespaceSchemaLocation="urn:magento:framework:App/etc/routes.xsd">
    <router id="standard">
        <route frontName="helloworld" id="helloworld">
            <module name="Code5fixer_Helloworld" />
        </route>
    </router>
</config>
File 2: Controller class Create a folder inside our module and name it as Controller. Inside Controller folder, create another folder and name it as Index. And create a php file inside Index folder and name it as Config.php
The contents of Config.php file will be :
Config.php
<?php
namespace Code5fixer\Helloworld\Controller\Index;
class Config extends \Magento\Framework\App\Action\Action
{
    protected $helperData;
    public function __construct(
    \Magento\Framework\App\Action\Context $context,
    \Code5fixer\HelloWorld\Helper\Data $helperData
    )
    {
        $this->helperData = $helperData;
        return parent::__construct($context);
    }
    public function execute()
    {
        echo $this->helperData->getGeneralConfig('enable');
        echo $this->helperData->getGeneralConfig('display_text');
        exit();
    }
}
Step 6 : Run all the necessary commands
We need to run commands like setup:upgrade, static-content:deploy, setup:di:compile, reindex and cache:flush from the Magento root directory.
To know more about more magento commands, refer this blog.
Open the below URL in your browser
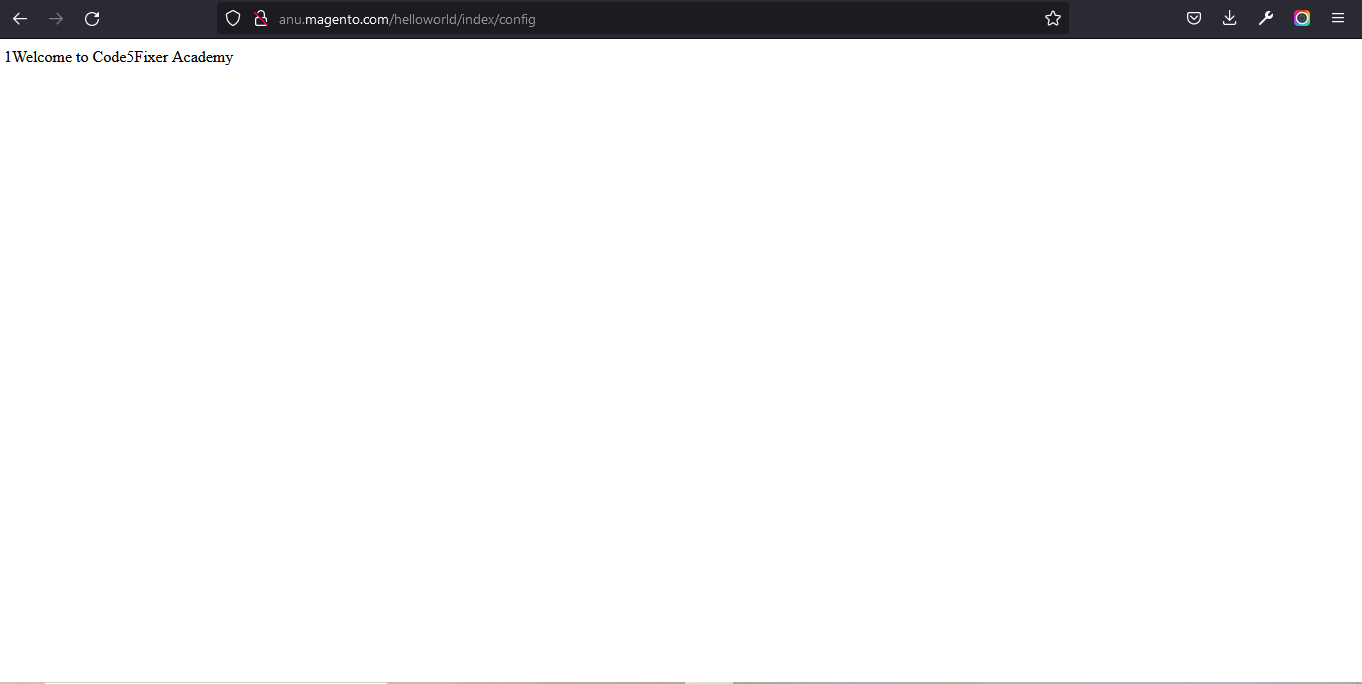
And now, the text ‘1Welcome to Code5fixer Academy’ (as I’ve given this text in Display Text field in admin configuration) should be displayed in a page in your browser as shown below.

Here, 1 indicates that the module is enabled.
You could also download the above module here
After downloading this module:
- Extract the downloaded zip file
- Paste the extracted Code5fixer folder into folder in your magento root directory.
- Run all the necessary 5 commands and check for output.
This module is developed using Magento ver. 2.4.3-p1 version. But if you try this in older or newer versions, it may give some errors.
You could also refer to this demo video for better understanding
We hope our guide would be very useful for you. If you have any questions, feel free to reach us anytime by leaving a comment below.
Check out our new blogs here
