
Overview
In this blog, let us see how to get customer collection in Magento 2. With the help of customer collection, one can filter all the store’s customer’s information by attributes.
Consider we want to filter out the names of all the customers with the firstname “Test”. Let us see the steps involved in creating such a custom module.
Step 1 : Create the 2 mandatory files:
Refer this blog and create module.xml file inside etc folder and registration.php file inside Code5fixer/CustomerCollection folder. Here, CustomerCollection is the name of the module folder.
Step 2 : Create a Controller file:
As a next step, we shall create a page using controller, in which we are going to display customer collection in the frontend. To do so, create a folder inside CustomerCollection folder and name it as Controller. Inside Controller folder, create a folder and name it as Customer and inside Customer folder, create a php file and name it as Index.php
The contents of Index.php file will be:
Index.php
<?php
namespace Code5fixer\CustomerCollection\Controller\Customer;
use Magento\Framework\App\Action\Context;
class Index extends \Magento\Framework\App\Action\Action
{
    protected $_resultPageFactory;
    public function __construct(Context $context, \Magento\Framework\View\Result\PageFactory $resultPageFactory)
    {
        $this->_resultPageFactory = $resultPageFactory;
        parent::__construct($context);
    }
    public function execute()
    {
        $resultPage = $this->_resultPageFactory->create();
        return $resultPage;
    }
}
Step 3 : Create routes.xml file:
To make a Controller to work, we need routes.xml file inside frontend folder of the etc folder.
The contents of routes.xml file will be:
routes.xml
<?xml version="1.0" ?>
<config xmlns:xsi="http://www.w3.org/2001/XMLSchema-instance" xsi:noNamespaceSchemaLocation="urn:magento:framework:App/etc/routes.xsd">
    <router id="standard">
        <route frontName="customercollection" id="customercollection">
            <module name="Code5fixer_CustomerCollection"/>
        </route>
    </router>
</config>
Remember, customercollection is the frontname and id.
Step 4 : Create a block file
Then, we shall create a block file on our custom module in the following path:
So, create a folder inside CustomerCollection folder and name it as Block and inside Block folder create a php file and name it as CustomerCollection.php
The contents of CustomerCollection.php file will be:
CustomerCollection.php
<?php
namespace Code5fixer\CustomerCollection\Block;
class CustomerCollection extends \Magento\Framework\View\Element\Template
{
    protected $_customer;
    protected $_customerFactory;
    public function __construct(\Magento\Framework\View\Element\Template\Context $context,
                                \Magento\Customer\Model\CustomerFactory $customerFactory,
                                \Magento\Customer\Model\Customer $customers,
                                array $data = []  )
    {
        $this->_customerFactory = $customerFactory;
        $this->_customer = $customers;
        parent::__construct($context, $data);
    }
    public function getCustomerCollection() {
        return $this->_customer->getCollection()
               ->addAttributeToSelect("*")
               ->load();
    }
    public function getFilteredCustomerCollection() {
        return $this->_customerFactory->create()->getCollection()
                ->addAttributeToSelect("*")
                ->addAttributeToFilter("firstname", array("eq" => "Test"))
                ->load();
    }
}
Here, getCustomerCollection() returns all the customers with their e-mail id and getFilteredCustomerCollection() returns all the customers with the first name “Test”.
Step 5 : Create a template file :
Now, we need to create a phtml file to display the customer name and e-mail id in frontend. For that, create a folder inside CustomerCollection module folder and name it as view. Inside view folder, create another folder and name it as frontend. Now, inside this frontend folder, create another folder and name it as templates. Inside this templates folder, create a phtml file and name it as customercollection.phtml
The content of customercollection.phtml
customercollection.phtml
<h1>Customer List</h1>
<?php //echo $this->getCustomerCollection(); ?>
<?php //var_dump($this->getCustomersCollection());
$customerCollection = $this->getCustomerCollection();
foreach ($customerCollection as $customer) {
echo 'Customer Name: '.$customer->getName().'<br/>';
echo 'Customer Email: '.$customer->getEmail().'<br/>';
echo '==============================================<br/>';
}
?>
<h1>Customer List with the name "Test"</h1>
<?php //echo $this->getFilteredCustomerCollection();
$customerCollection = $this->getFilteredCustomerCollection();
foreach ($customerCollection as $customer) {
echo 'Customer Name: '.$customer->getName().'<br/>';
echo 'Customer Email: '.$customer->getEmail().'<br/>';
echo '==============================================<br/>';
}
?>
Step 6 : Create a layout file:
If we want to call a phtml file on a page then we need to create a layout file to achieve this. As a next move, let us create a folder inside frontend folder and name it as layout and inside this layout folder, create an xml file and name it as customercollection_customer_index
Here, route id (specified in routes.xml)_name of the folder inside controller folder_action class must be the name of this layout file.
The contents of this layout file will be:
customercollection_customer_index
<page xmlns:xsi="http://www.w3.org/2001/XMLSchema-instance"
xsi:noNamespaceSchemaLocation="../../../../../../../lib/internal/Magento/Framework/View/Layout/etc/page_configuration.xsd" layout="1column">
    <body>
        <referenceContainer name="content">
            <block class="Code5fixer\CustomerCollection\Block\CustomerCollection" name="customercollection" template="customercollection.phtml" />
        </referenceContainer>
    </body>
 </page>
Step 7 : Run all the necessary commands
We need to run commands like setup:upgrade, static-content:deploy, setup:di:compile, reindex and cache:flush from the Magento root directory.
To know more about more magento commands, refer this blog.
Let us open the below URL in our browser
And now, our browser will be as shown below.
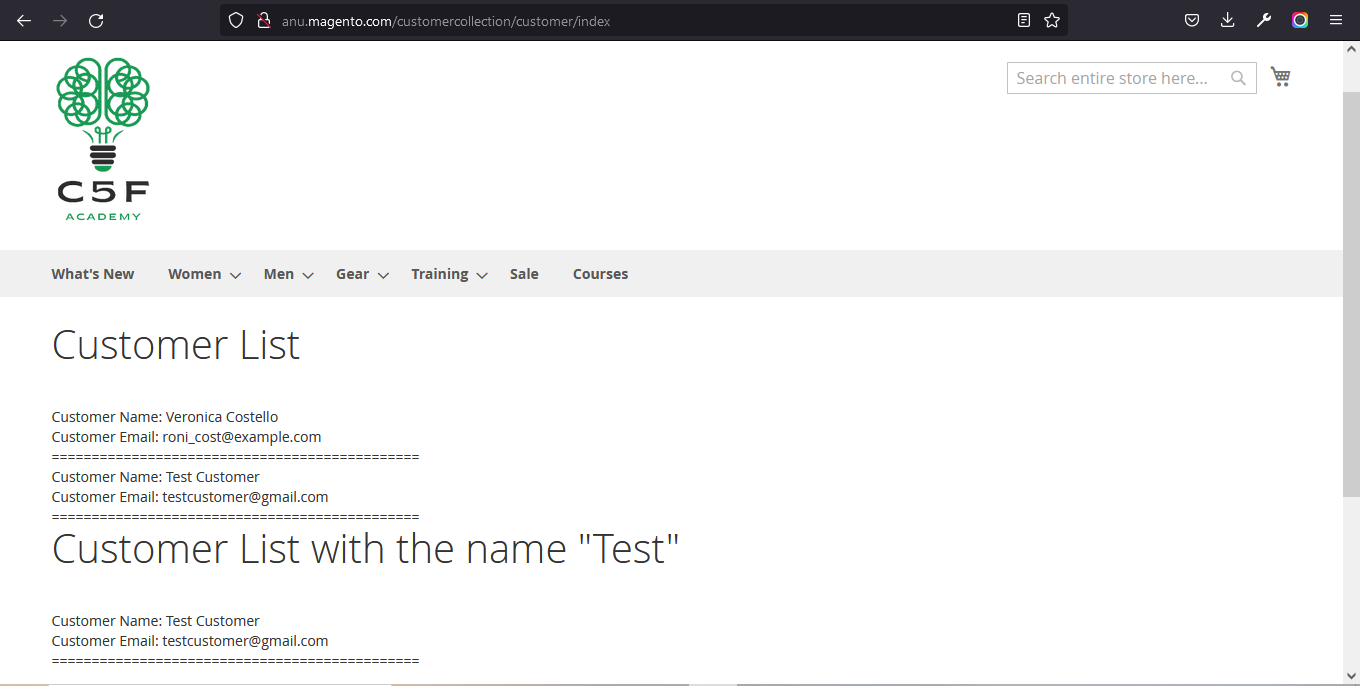
We hope, with the help of the above steps, you will be easily getting the customer collection in Magento2. Also, share this blog with your developer friends.
You could also download the above module here
After downloading this module:
- Extract the downloaded zip file
- Paste the extracted Code5fixer folder into /app/code/ folder in your magento root directory.
- Run all the necessary 5 commands and check for output.
This module is developed using Magento ver. 2.4.3-p1 version. But if you try this in older or newer versions, it may give some errors.
You could also refer to this demo video for better understanding.
We hope our guide would be very useful for you. If you have any questions, feel free to reach us anytime by leaving a comment below.
Check out our new blogs here